Obtain an SSL certificate effortlessly with a free subdomain for your Ant Media Server with a simple command! This incredible feature is available for Enterprise users versions 2.5.2 and beyond and it brings heightened security to your server.
Say goodbye to complexity and hello to a seamless SSL installation process. In this blog post, we’ll guide you through the steps to secure your Ant Media Server with an SSL certificate in different ways.
Enabling SSL is not mandatory for all cases. However, it’s mandatory when requesting access to the mic and camera. It’s not mandatory for playing streams , HTTPS and WSS (WebSocket Secure) are mandatory for Google Chrome to run WebRTC and WebSocket applications.
Furthermore, developers want to provide their content through a secure connection. The server package includes a script that installs the Let’s Encrypt SSL certificate.

Table of Contents
Enable SSL in Linux (Ubuntu, RockyLinux, Alma)
Let’s Encrypt
Let’s Encrypt is a free certificate authority developed by the Internet Security Research Group (ISRG).
If there is a service that uses 80 port, you need to disable it. If your system has Apache Web Server, you need to disable it first such a command below
sudo service apache2 stop
Make sure that your domain points to your server’s public IP address in the DNS records before running enable_ssl.sh script.
Option 1: Enabling SSL from the Web Panel
In previous versions of Ant Media Server, configuring SSL and generating a certificate involved a few steps using the terminal as seen below.
However, with the release of Ant Media Server version 2.6.2, this process is more streamlined for SSL enablement. Now you can secure your Ant Media Server directly from the Web Panel.
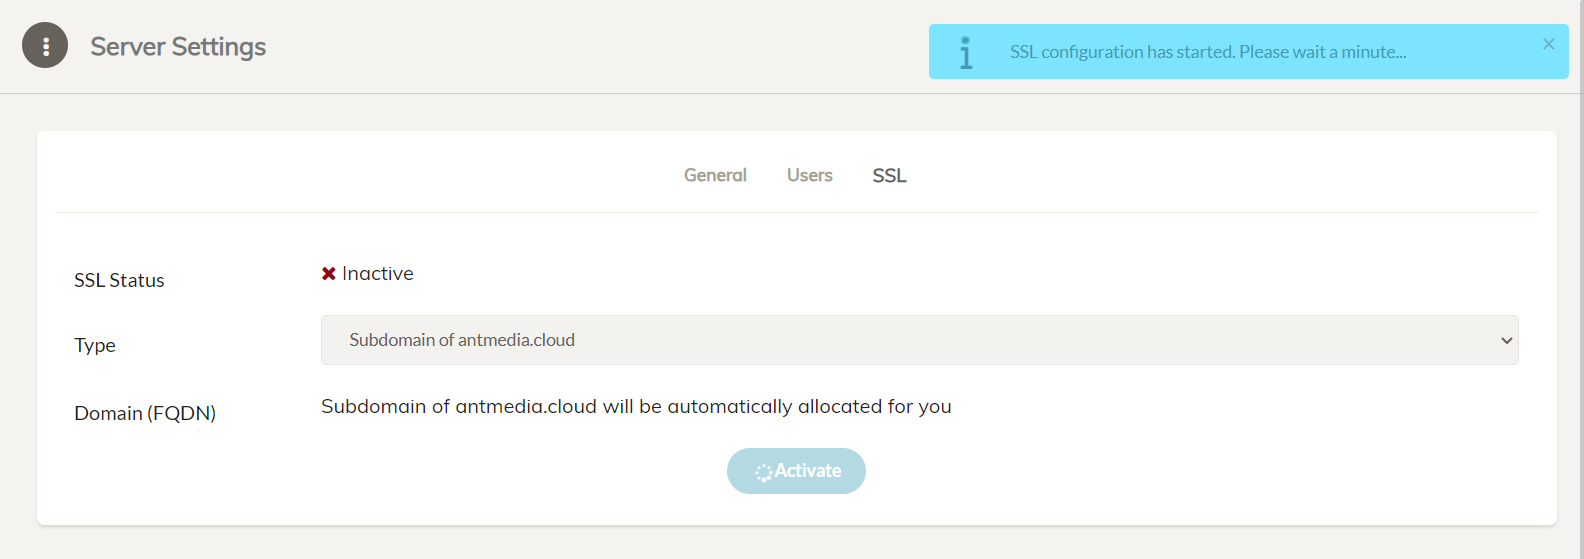
Navigate to the settings > SSL section of the web panel.

In the drop-down menu “Type”, choose one of the most appropriate options to enable SSL. For instance, using your own domain, get a free subdomain of antmedia.cloud, or import your own certificate.

Then click the Activate button to enable the SSL automatically. There is no restarting required, simply refresh your web browser and log in again.

Option 2: Gets a free subdomain and install SSL with Let’s Encrypt
As previously stated, the most interesting aspect is that you can create a subdomain and an SSL certificate with a single command.
You can utilize this method if you do not have a domain name and wish to install an SSL certificate. With this feature, enterprise users will receive a free subdomain name with the extension ams-[id].antmedia.cloud, and the Let’s Encrypt certificate will be installed immediately. This feature is accessible in versions after 2.5.2.
Go to the folder where Ant-Media-Server is installed. Default directory is /usr/local/antmedia
cd /usr/local/antmedia
Just call the enable_ssl.sh script without parameters.
sudo ./enable_ssl.sh
Option 3: Create a Let’s Encrypt certificate with your domain
Go to the folder where Ant-Media-Server is installed. Default directory is /usr/local/antmedia
cd /usr/local/antmedia
Call the enable_ssl.sh with your domain name
sudo ./enable_ssl.sh -d example.com
If Option 1 and Option 2 ‘s scripts return successfully, SSL will be installed on your server, you can use HTTPS through 5443. Like below
https://example.com:5443
Option 4: Use your own certificates
enable_ssl.sh script supports external fullchain.pem, chain.pem and privkey.pem files as in the following format
sudo ./enable_ssl.sh -f {FULL_CHAIN_FILE} -p {PRIVATE_KEY_FILE} -c {CHAIN_FILE} -d {DOMAIN_NAME}
Ex:
sudo ./enable_ssl.sh -f yourdomain.crt -p yourdomain.key -c yourdomainchain.crt -d yourdomain.com
sudo ./enable_ssl.sh -f yourdomain.pem -p yourdomain.key -c yourdomainchain.pem -d yourdomain.com
If you disable any service that binds to 80 port such as Apache Web Server, enable it again
sudo service apache2 start
ATTENTION: If port 80 is used by some other process or it’s forwarded to some other port, enable_ssl.sh will not be successful. Please disable the process or delete the port forwarding temporarily before running the enable_ssl.sh script above.
That’s all. I hope this small blog post will help you in enabling SSL. By the way, please let us know if you have a question or need help with this issue or any other one.


