Whether you’re a broadcaster, start-up, or corporate company in the streaming business, you should look for new ways to improve live streaming quality. It’s important to prioritize your customers’ viewing experience while creating live streams. Customers are likely to drop out of the broadcast if the video is low quality or if the live broadcast extensively starts buffering on the player side.
Research has also shown that business revenues that depend on live streaming can drop up to 25% if the quality of the broadcast is poor. Therefore, it’s a common goal for all broadcasters to deliver the best quality broadcasts to retain their viewers who could also be potential customers for their products or services.
Thankfully, there are several ways in which you can improve the quality of your broadcasts including using media servers, streaming engines, and more.
The Importance of Live Streaming Quality

10 Ways to Improve Live Streaming Quality
When it comes to a successful broadcast, the first thing that comes to mind is quality. Further reading, we will tell you how to improve live streaming quality in 10 steps.
1) Choose professional equipment for your live stream
How can you improve live streaming quality? The obvious first step to creating high-quality live streams is using professional equipment that delivers high-quality video and sound. It includes cameras, mics, and lights. This step is crucial because you cannot improve the quality once you go live. A professional camera, mic, and light will capture bright and clear video and low background noise.
2) Check your internet
The second step is to have a fast internet connection. A high-quality live stream requires a very strong internet connection and a lot of bandwidth. The best action would be to connect an ethernet cable to your computer instead of using the Wi-Fi and disconnect all other devices from the Wi-Fi to improve live streaming quality. Also, close all unnecessary apps and other browsers open in the background so that they don’t eat up system resources and internet bandwidth.
3) Optimize your browser
Close every tab that you don’t need for the live stream and turn off all the browser extensions you do not require. You can always turn them on later, but this way, they won’t consume your internet bandwidth. It’s also important to use a media server that offers WebRTC streaming such as Ant Media.
4) Use appropriate encoder settings
Almost all live streams use a video and audio encoder to make your broadcast compatible with your viewers’ devices. Ensure that you use the correct settings for this as it determines the quality of the video and audio that is transmitted to your audience. If you don’t know how this works, it’s best to use the recommended settings of your streaming engine.
5) Use multiple bitrates
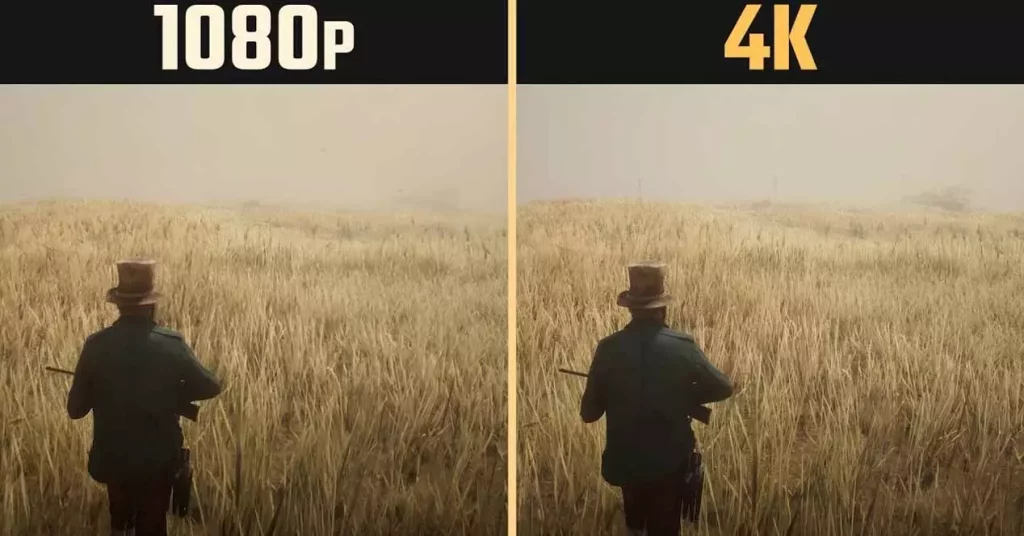
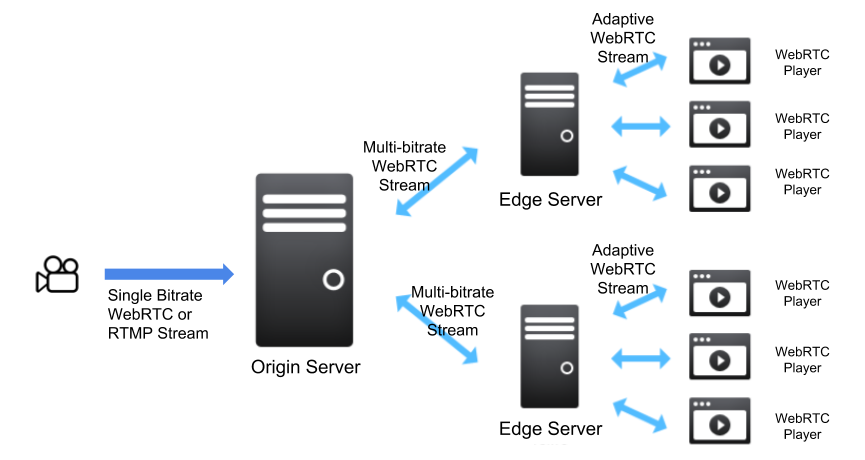
When you use multiple bitrates for live streaming, your broadcast is delivered to viewers at various quality levels. Not all viewers have access to high-speed internet or a 4k screen, so multiple bitrates will ensure that they receive the broadcast in the quality best suited for their conditions.
This is one of the most important actions that you can take to improve live streaming quality. It improves the user experience while helping you improve live streaming quality.
6) Use WebRTC, HLS and Adaptive Streaming
WebRTC stands for web real-time communications. It is a very exciting, powerful, and highly disruptive cutting-edge technology and streaming protocol, providing 0.5-seconds latency. Thanks to WebRTC video streaming technology, you can create an engaging and interactive streaming experience for your audience without worrying about delay.
You can also create a unique live streaming experience by combining real-time latency and adaptive bitrate streaming. Your viewers get the highest quality stream according to their internet speed in real-time latency. With a powerful streaming engine such as Ant Media, you can get ultra-low latency that goes as low as 0.5 seconds. It allows users to watch your broadcast without lags or delays.
If the streaming latency isn’t that important to you, you can use HLS (HTTP Live Streaming). Adaptive bitrate streaming and HLS are protocols that divide the broadcast into independent sections. The divided sections can adapt to network fluctuations and the video player’s buffer time, allowing for seamless broadcast delivery.
HLS and Adaptive streaming combined with appropriate encoder settings and multiple bitrates will deliver a glitch-free viewing experience.
7) Choose a powerful CDN
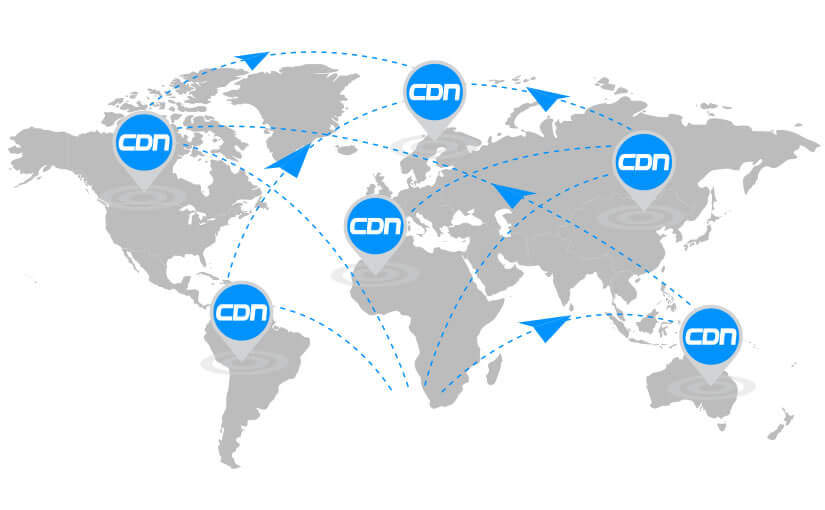
A Content Delivery Network (CDN) is an often-overlooked part of professional live streaming which is extremely important. A strong CDN allows recent chunks of your video to be stored in its cache memory. It allows viewers to watch the recent chunks when they join or seek the video back without overloading your browser. Just a note that WebRTC can not be used with a CDN, as it requires special software implemented within CDN nodes.
8) Choose a scalable streaming server
With the increase in the number of viewers, you don’t want your broadcast to crash and errors to occur, so you don’t want to have a terrible user experience, do you?
With a scalable platform, you can enhance your streaming server matching the number of viewers and avoiding these problems. With a powerful streaming engine such as Ant Media, you can scale the number of publishers and viewers easily with an auto-scale cluster.
AMS supports millions of viewers and streams at the same time under 0.5 seconds of latency.
9) Use a professional platform for streaming
All the above settings make for a glitch-free and high-quality broadcasting experience, but it can be difficult to implement all of it on your own. Besides, social platforms may not even provide access to all these settings. Hence, it’s imperative to use a professional streaming engine that has all these facilities built-in to improve live streaming quality.
A professional engine can be often embedded into your website. This way, it will improve streaming quality while also providing other facilities such as
- Scalable WebRTC streaming
- Live video monitoring and surveillance
- Better security features than social platforms
- The ability to optimize your website with SEO.
10) Test everything
The last but most important step to a high-quality broadcast is testing everything. You must ensure that your cameras, lights, mics, and computer are working perfectly. You must also test your internet connection and streaming settings. If you are going to use a venue, it’s also a good idea to test everything at the building where you will shoot the broadcast to ensure everything is proper.
Conclusion
As a streamer or broadcaster, you should be focusing on maximizing the quality of your broadcasts. In this blog post, we tried to guide you on how to improve live streaming quality in 10 steps. However, to improve live streaming quality, you should constantly research the latest technologies and trends.
If you’re planning to invest in a powerful streaming solution, it makes sense to try it first. You can start trying Ant Media Server for 14 days. No credit card is required, so you don’t have to worry about anything.
Let us know if you have any other questions or comments about improving stream quality or anything streaming-related. We’d love to hear from you in the comment section below or you can directly contact us via contact@antmedia.io.


