Unlock the full potential of your streaming platform on Oracle Cloud with our comprehensive guide on how to scale Ant Media Server on the Oracle Cloud Platform in order to create a streaming service at scale.
As the demand for seamless, high-quality live streaming continues to grow, the ability to scale efficiently in real time becomes paramount.
In this detailed post, we will explore the nuances of expanding your Ant Media Server infrastructure within the Oracle Cloud, guaranteeing peak performance and an outstanding viewing experience for your audience.
Table of Contents
Why should you set up your streaming service using Ant Media Server on Oracle Cloud?
Ant Media Server can be deployed on-premise or on cloud. One of the supported cloud providers is Oracle Cloud. Read more other providers and Ant Media Server scaling in general on our documentation.
- Ant Media Server is the first and only live streaming engine on Oracle Cloud.
- Oracle has a different pricing model from other cloud marketplaces. Generally cloud servers have prices structured like 2/4/8/16/32 CPU cores. Oracle has a pricing structure per CPU core so you can use it with 3 cores or 5 cores, etc.
- Oracle has a scaling system in which the same CPU cores can be increased automatically as the load increases without having to launch new nodes.
Prerequisite or what you should have when you start
- You should have an Oracle Cloud account.
- You should have a tenancy configured for your Oracle Cloud account. When you create an account, it automatically creates a tenancy as part of the account creation process. Just make sure you actually have it.
Step 1: Create a Compartment
Compartments on the Oracle Cloud are like projects. So as the first step, we’ll create a new project by creating a compartment and then we will use the same compartment for creating all the resources.
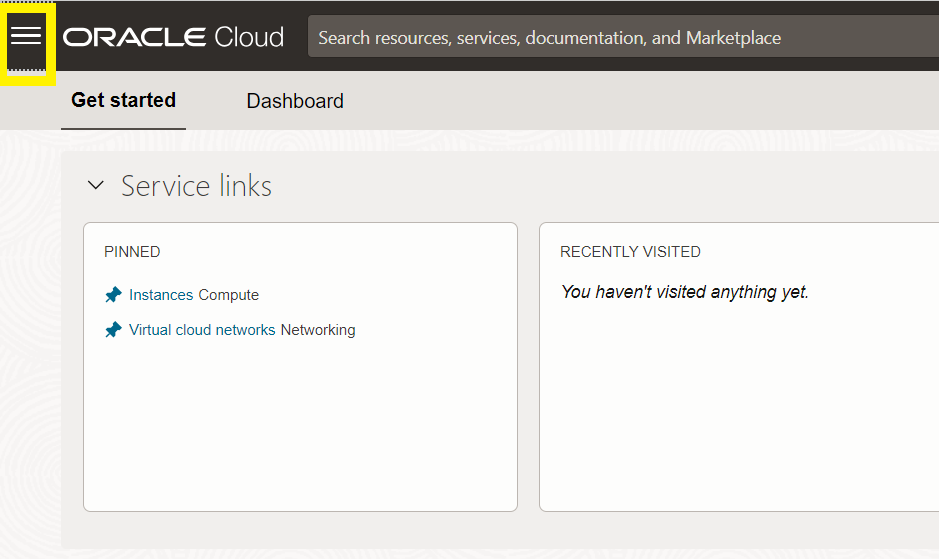
- Check for the three horizontal lines on the top left of the screen next to the Oracle Cloud logo
- Go to the Identity & Security section and then to Compartments and finally click Create Compartment.
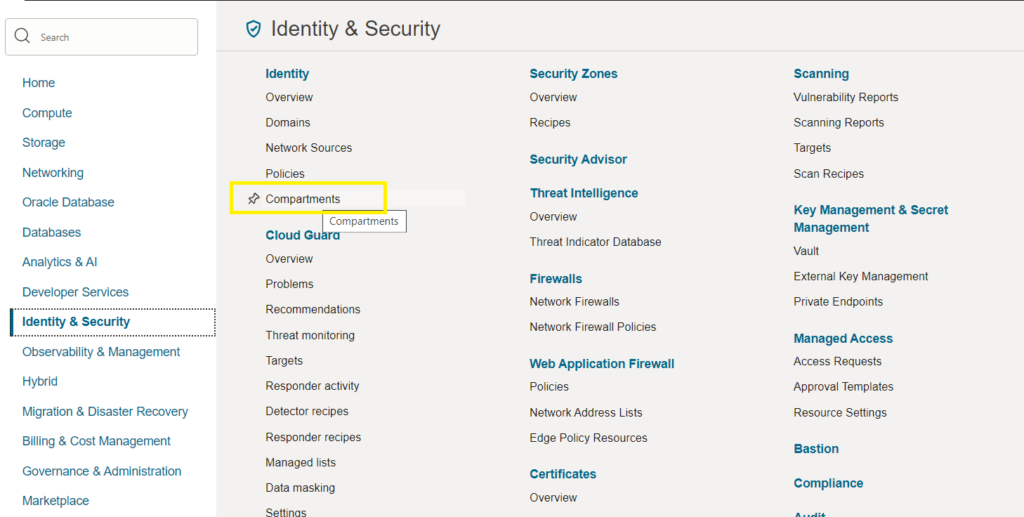
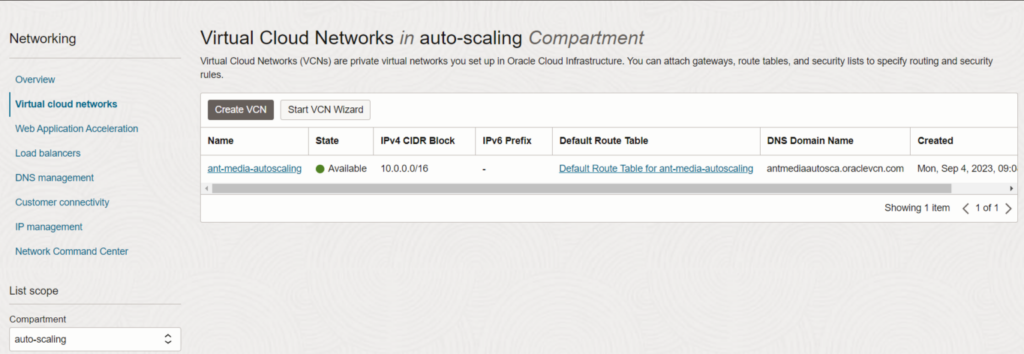
- For this demo, I have created a compartment named auto-scaling. And throughout this implementation, we’ll be using the same compartment.
Step 2: Create a Virtual Cloud Network (VCN)
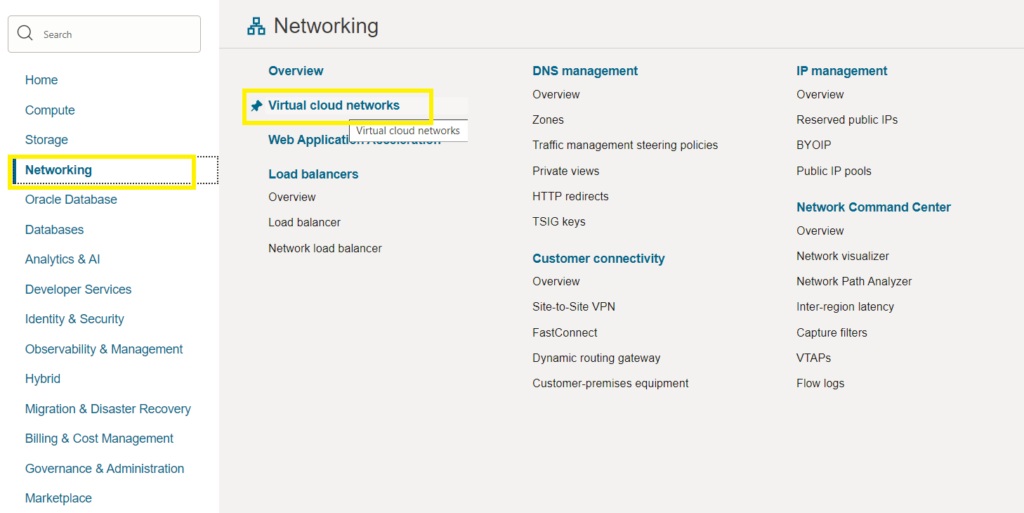
- Go to Networking and then to Virtual Cloud Networks.
- Click on Create VCN to create Virtual Cloud Networks and enter a CIDR range.
- In the VCN, create a Subnet.
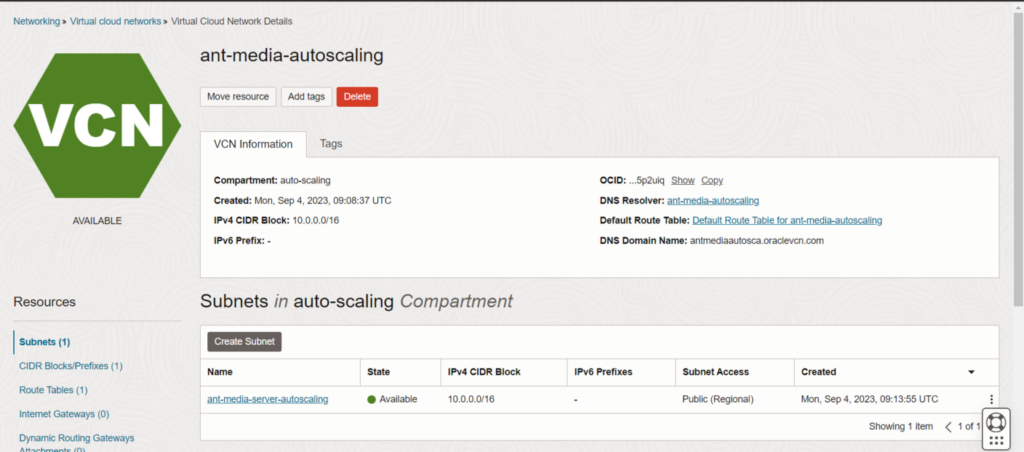
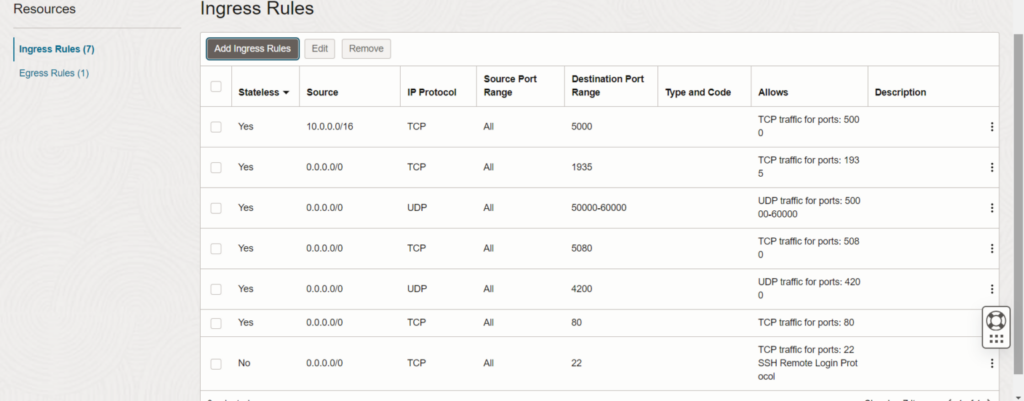
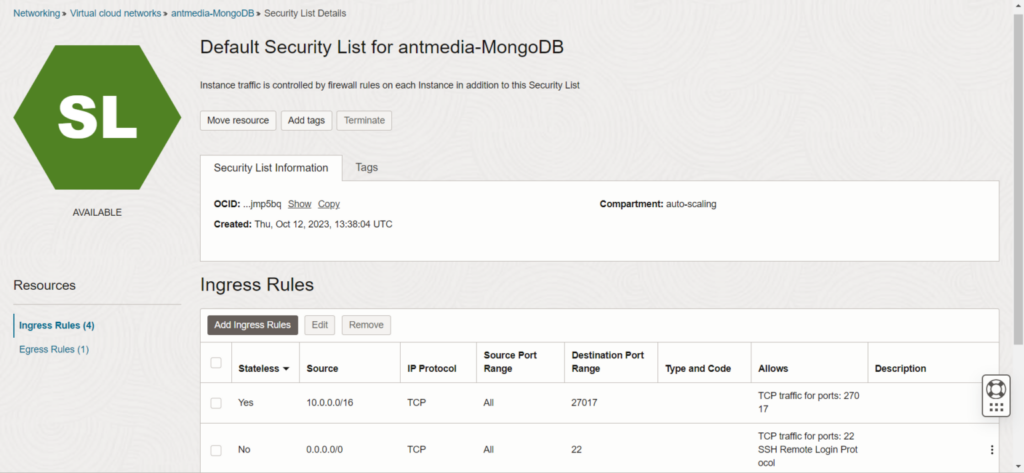
- In the Subnet, you need to add a Security List with the required ports.
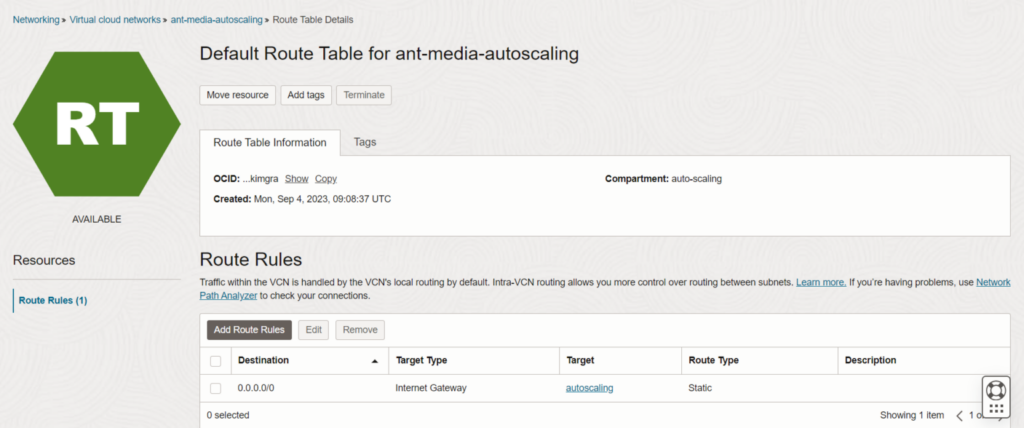
- Create an Internet gateway and a Routing Table and attach it to the IG.
Step 3: Install the MongoDB server
- To create an instance on Oracle Cloud, Go to Compute and then to Instances.
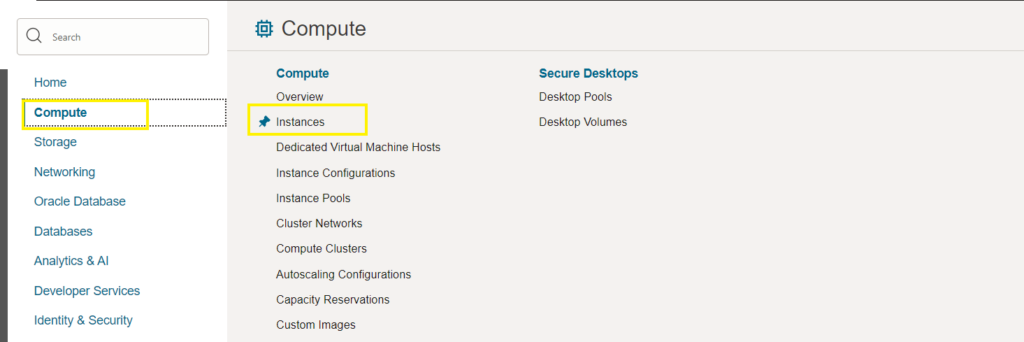
- Click on Create Instance and give your MongoDB instance a name.
- Use the same compartment and choose the Availability domain in which you want to launch the MongoDB database.
- Under Image and Shape, for the image click on Change Image and select Ubuntu and then choose Ubuntu 20.04 and click Select Image.
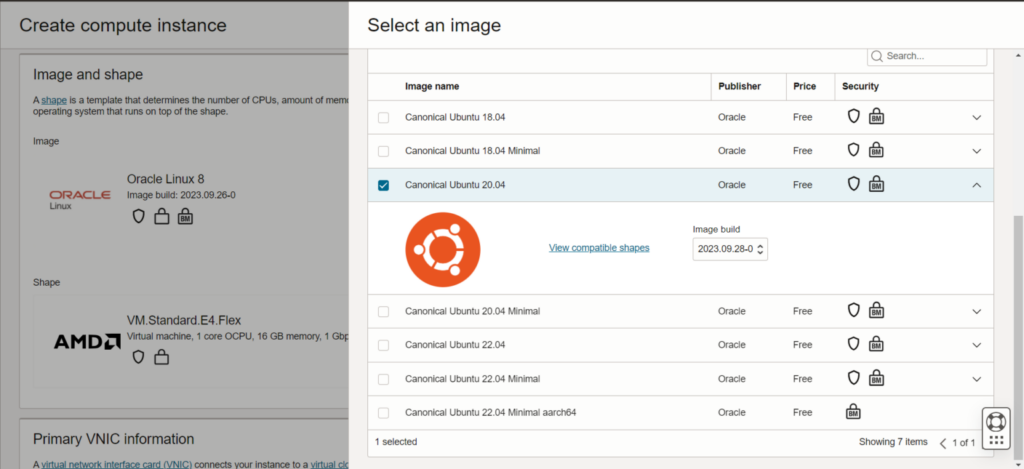
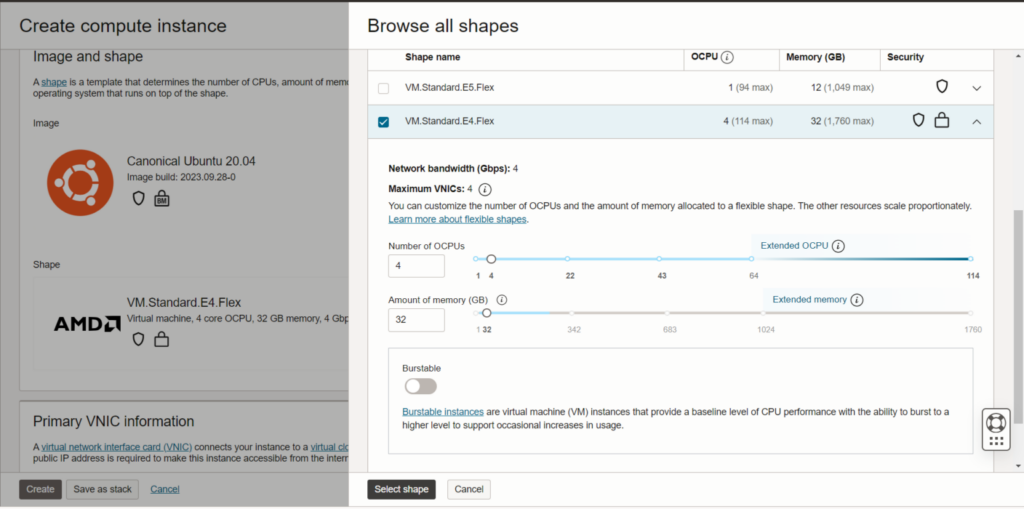
- Change the shape as desired and then click Select shape.
- As we did in step 2, we need to create a VCN for the MongoDB as well and select the same network and subnet for the MongoDB.
- Create the SSH details by either downloading a new private key or by uploading the public key as needed.
- Click Create.
- Once the instance is launched, ssh to the MongoDB instance and install SSL:
wget https://raw.githubusercontent.com/ant-media/Scripts/master/install_mongodb.sh && chmod +x install_mongodb.sh
sudo ./install_mongodb.sh --auto-create
- After the installation is successful, please note down the MongoDB username and password.
Step 4: Install Ant Media Server Enterprise Edition
- Again, go to Compute and then to Instances on Oracle Cloud dashboard.
- Click on Create Instance and give the instance a name.
- Use the same compartment that you created in Step 1 and choose an Availability domain.
- Under Image and Shape, for Image click on Change Image and then on Marketplace, and then search and choose Ant Media Server. After checking the agreement box, click on Select Image.
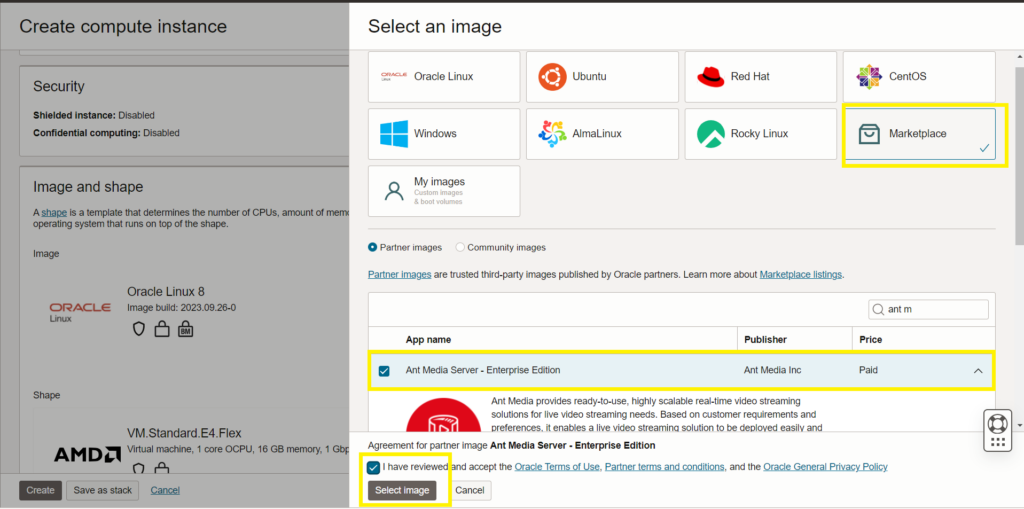
- Change the shape and set as desired. It is recommended to use at least a 4-core Server with 8GB RAM for running the AMS enterprise edition efficiently.
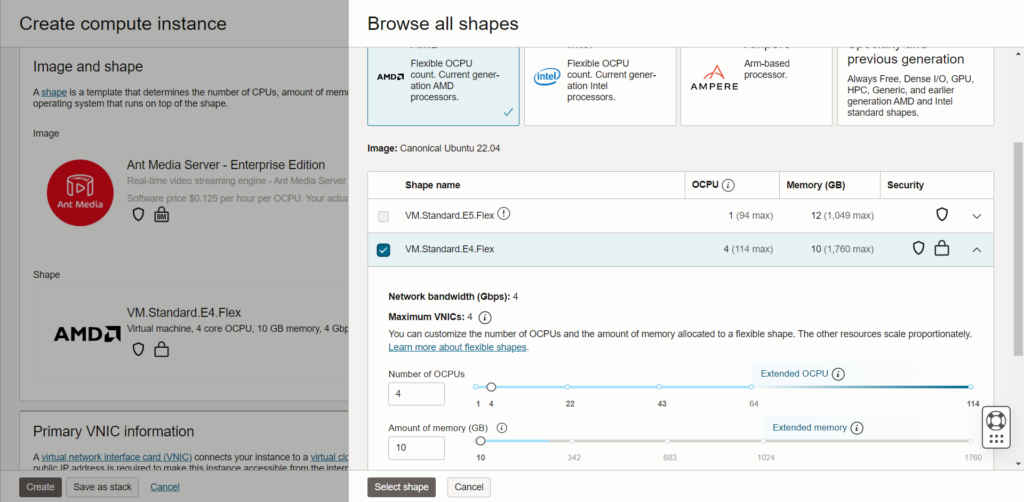
- Choose the VCN that you created in Step 2.
- Create the SSH credentials as needed.
- Under Advanced Options, go to the initialization script and click on the cloud-init script, copy the text below, change the MongoDB IP Address, username, and passwords in the script according to your MongoDB credentials, and paste it.
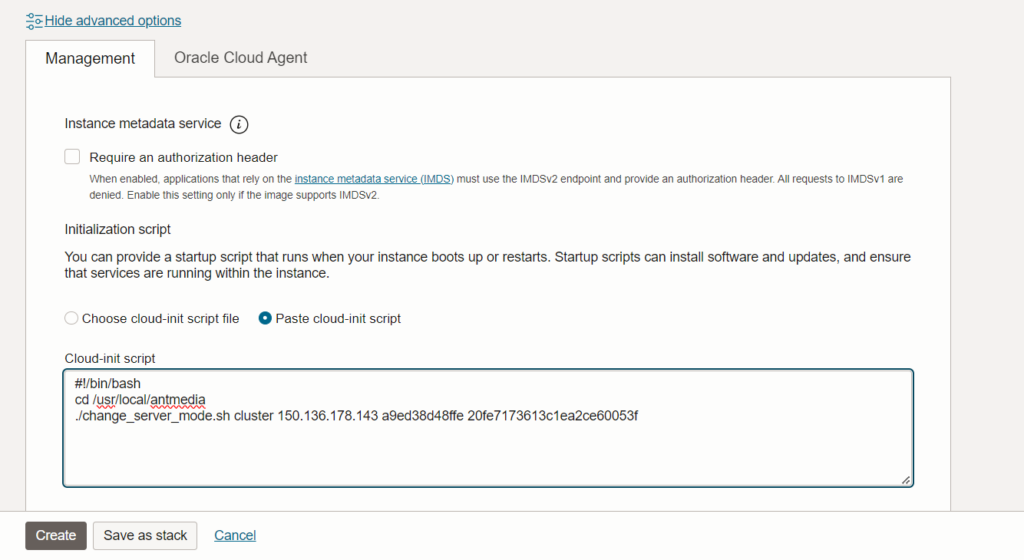
#!/bin/bash
cd /usr/local/antmedia
./change_server_mode.sh cluster 10.128.0.5 username password- Check if everything is OK and Click Create.
Step 5: Create Instance Configuration
- Once the instance is launched and running, go to actions and then click on Create Instance Configuration.

- Use the same compartment, give it a name, and click Create Instance Configuration.
- Once the Instance configuration is created, we can create an Instance Pool.
- We will create two Instance pools, one each for the Origin and Edge Group but before that, we need to create Load Balancers.
Step 6: Create the Load Balancers
- Under Networking, you can locate Load Balancer.

- Here we’ll create two Load Balancers, one for the Origin group and the second one for the Edge group.
Origin Load Balancer
- Under Load Balancer, click on “Create Load Balancer”
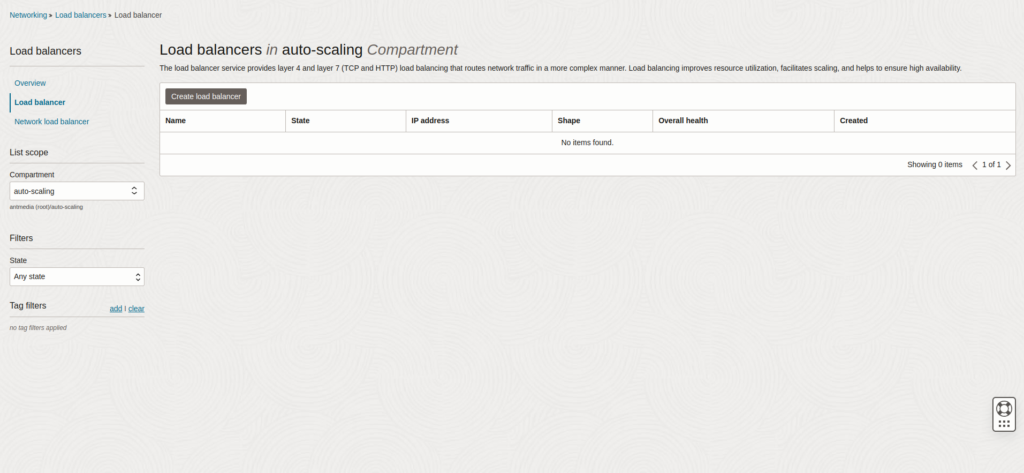
- Give your Load Balancer a name, the visibility type should be public, and the IP address should be Ephemeral IP address.
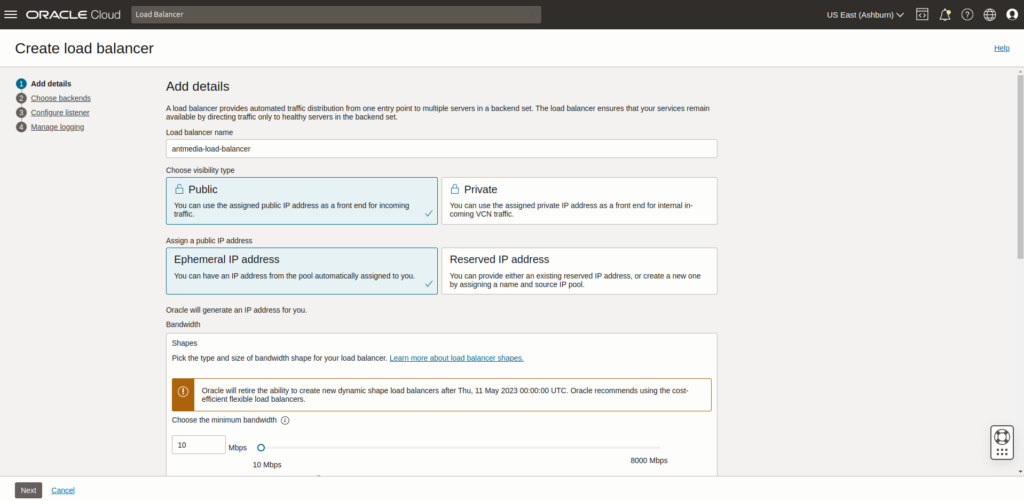
- Define the bandwidth and for Networking, under the Virtual Cloud network, choose the related compartment and the subnet.
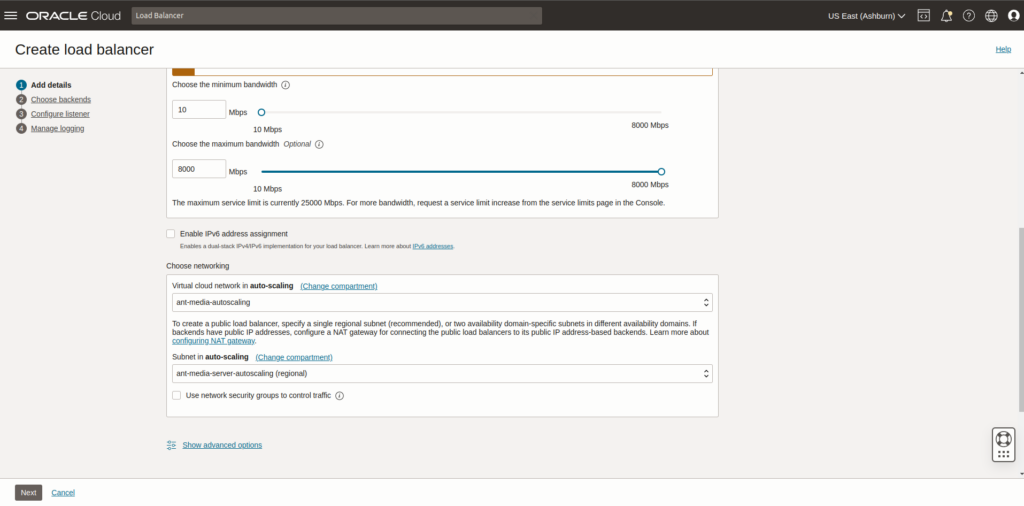
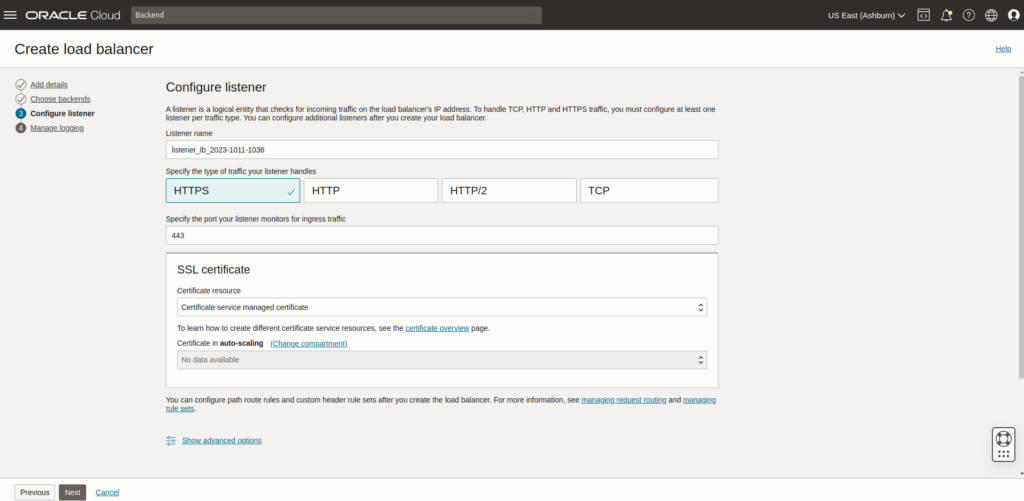
- Under Configure listener, give the listener a name, the traffic type should be HTTPS and the port is 443 for the Origin group.
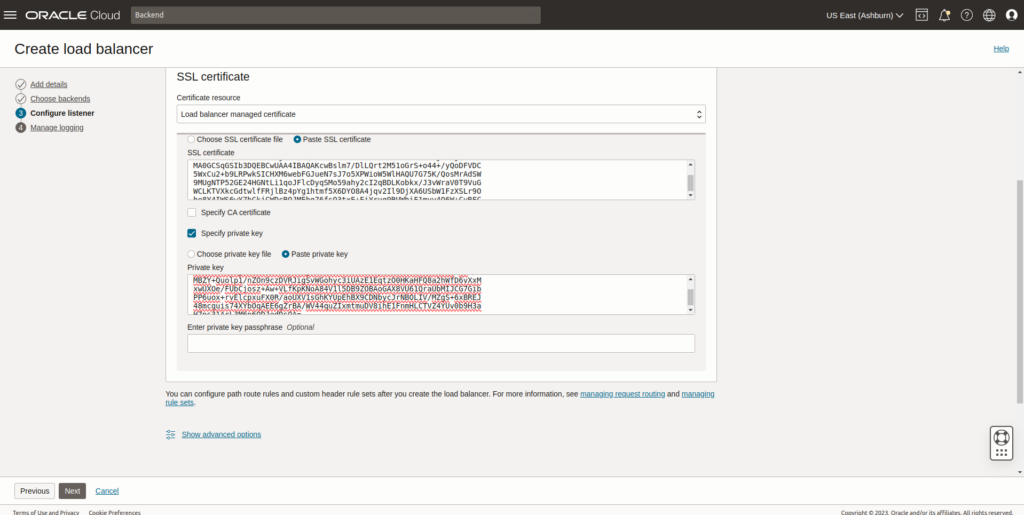
- Now in order to enable the SSL, choose “Load balancer managed certificate” under “Certificate resource”, then paste the SSL certificate and the private key.
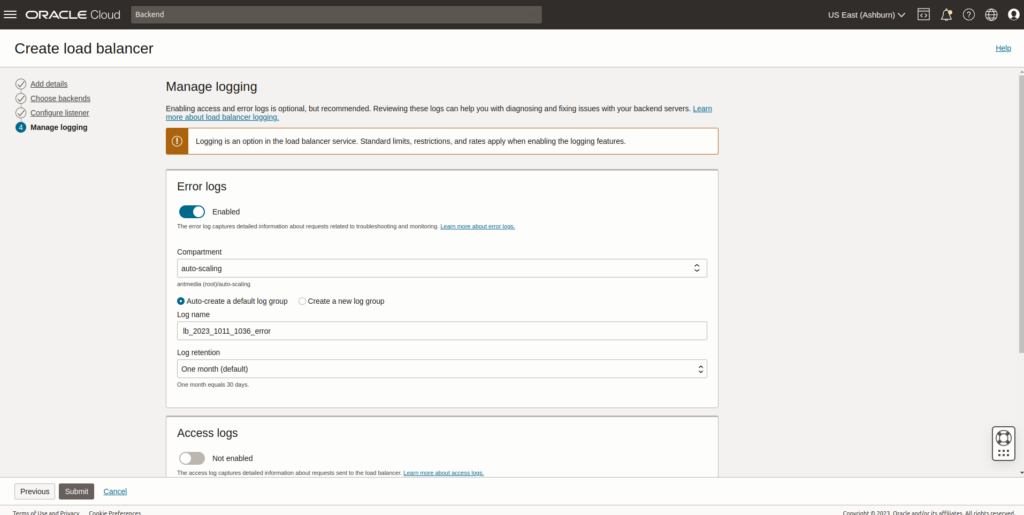
- Then you can enable logging as needed.
Edge Load Balancer
Similarly, we can create the Load Balancer for the Edge group of nodes as well. The only change is under “Configure listener” use port 5443
Step 7: Create Origin Instance Pool
- Go to Compute > Instance Configuration > Create Instance Pool
- Add Basic details and click Next.

- Configure Pool Placement.
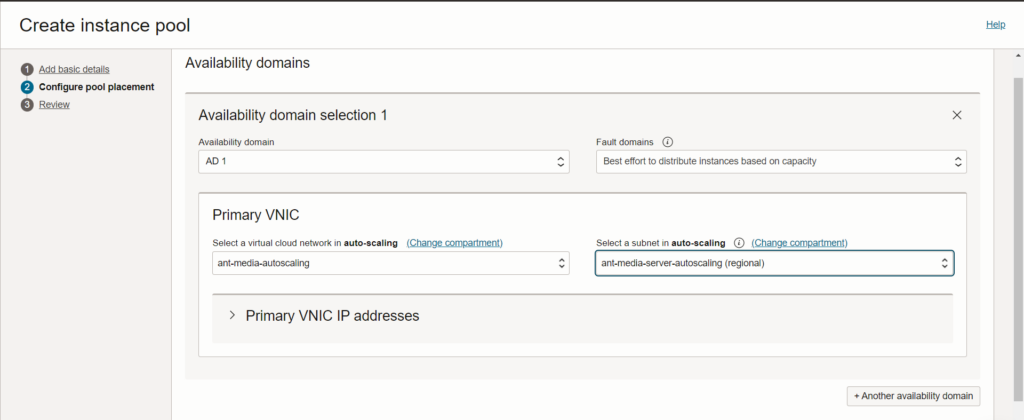
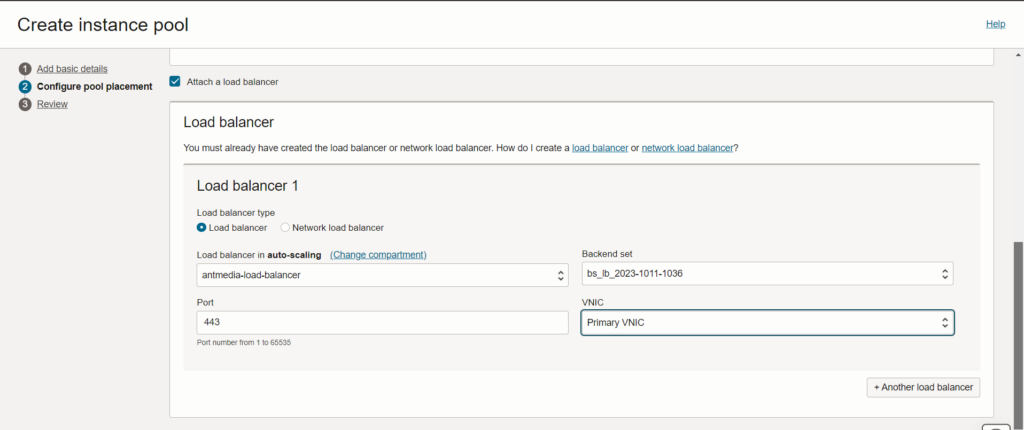
- Attach the Load Balancer.
- Review and click Create.
Step 8: Create Autoscaling Configurations for Origin
- After the instance pool is created, click on More Actions and Autoscaling Configurations.

- Add Basic details.
- Under Policy, select Metric-Based autoscaling.
- Under Performance metric, choose CPU utilization and set scale out to greater than 65 percent and add one.
- Set the Scale in, for less than 40 percent and remove one.
- Under Scaling limits, It can be set as needed.
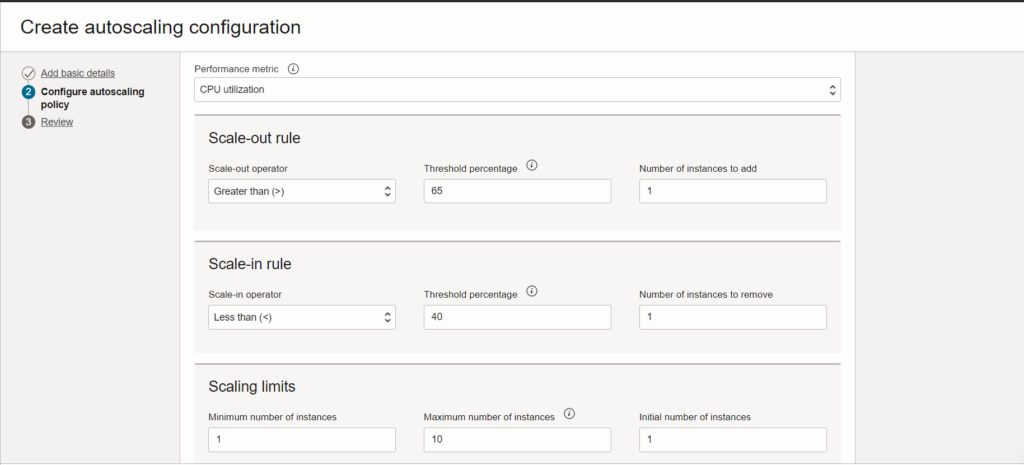
- Click Next and then Review and Create.
Step 9: Set up Edge Instance Pool and Autoscaling Configurations
We can follow steps 7 and 8 to create the Instance pool for the Edge group and then the Autoscaling configurations.
Step 10: Access the Ant Media Server Web Panel
Once the setup is complete, you can access the Ant Media server cluster web panel by using the Load Balancer URLs.


