How to Setup Teradek Vidiu Pro ?
We have got Teradek Vidiu Pro for a while and running some tests on Teradek Vidiu Pro for both Ant Media Server community and enterprise edition. We can say that Teradek Vidiu Pro is compatible with Ant Media Server 1.2.0+ which you can download Community Edition on github.com
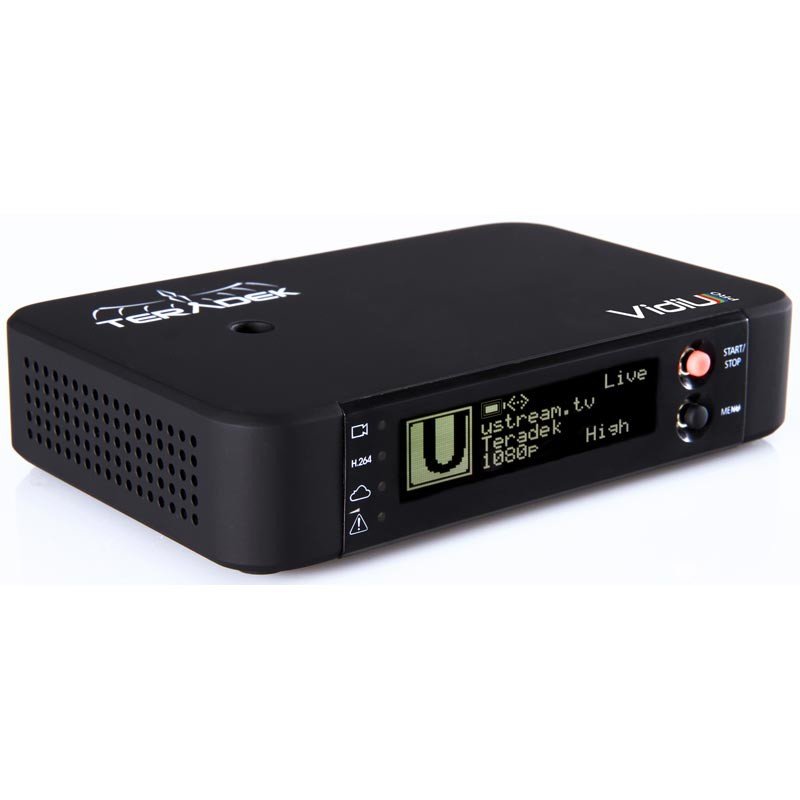
The first impression about Teradek Vidiu Pro is that its size so small [119.38 x 76.2 x 30.48mm] and it has great features like WiFi, Ethernet, USB Modem Interfaces to connect to the Internet, HDMI input, Analog Audio Input, Web Interface, SD Card and USB disk recording, etc. It’s like an Atom Ant 😛
So far this post about is a generic setup of Teradek’s Vidiu Pro and use with Ant Media Server. Nevertheless, Teradek has powerful iOS apps, we do not cover these apps in this post.
OK. Let’s start by powering the Teradek Vidiu Pro
Connect to Teradek Vidiu Pro WiFi Network
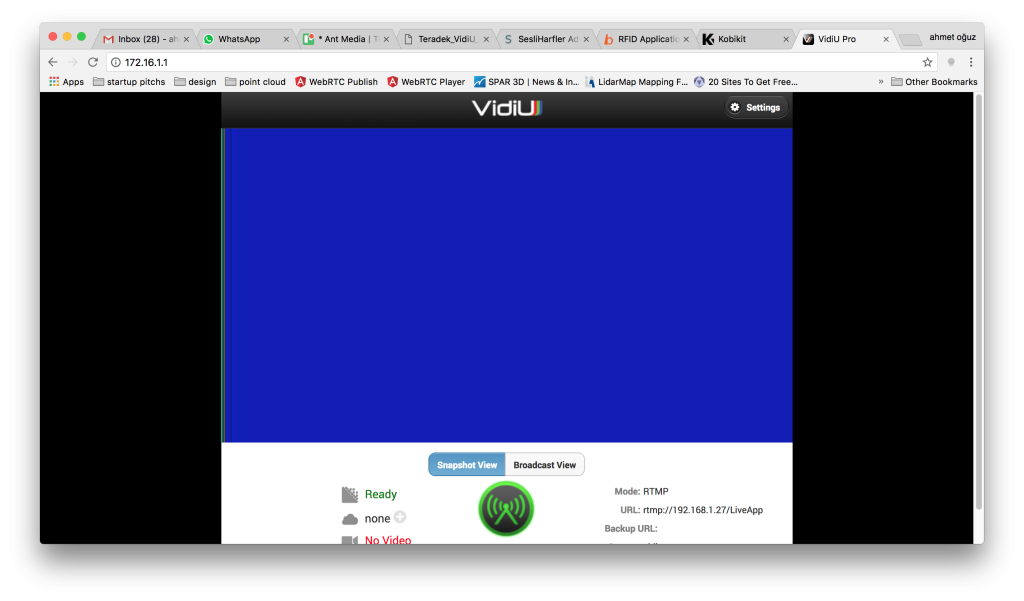
After you power the Vidiu Pro, it creates a WiFi network with name VidiU−XXXXX. Connect that network with your computer and go to the 172.16.1.1 on your browser.
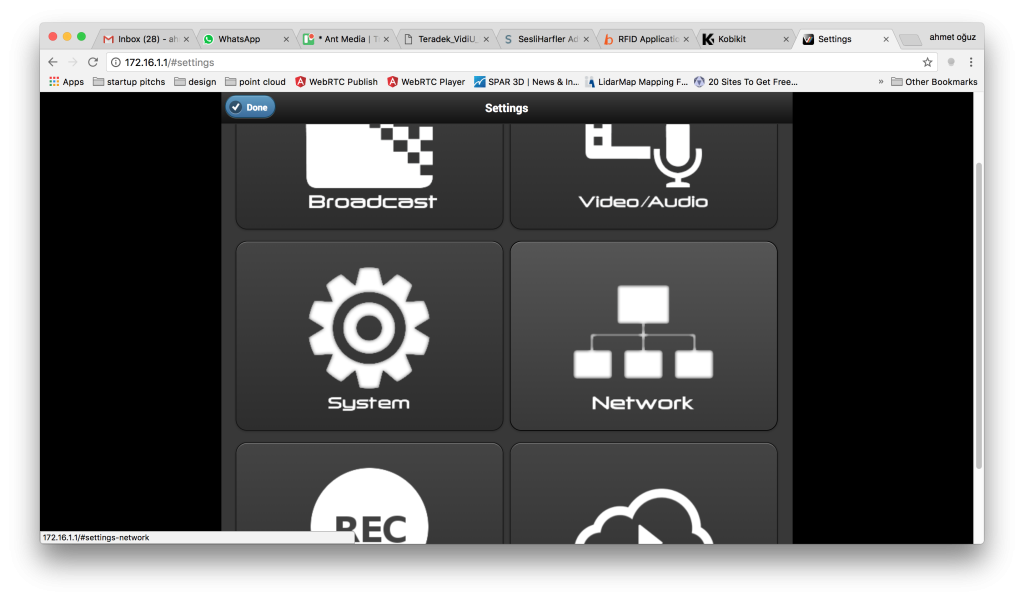
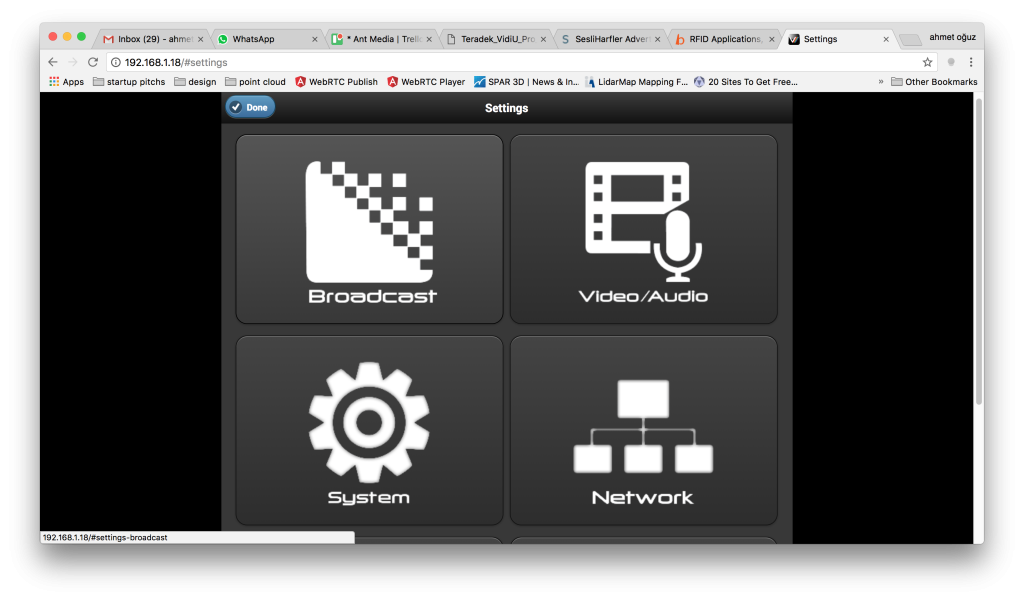
Click “Settings” button on the top right and then click “Network” item on the screen.
Configure Wireless Network Connection of Teradek Vidiu Pro
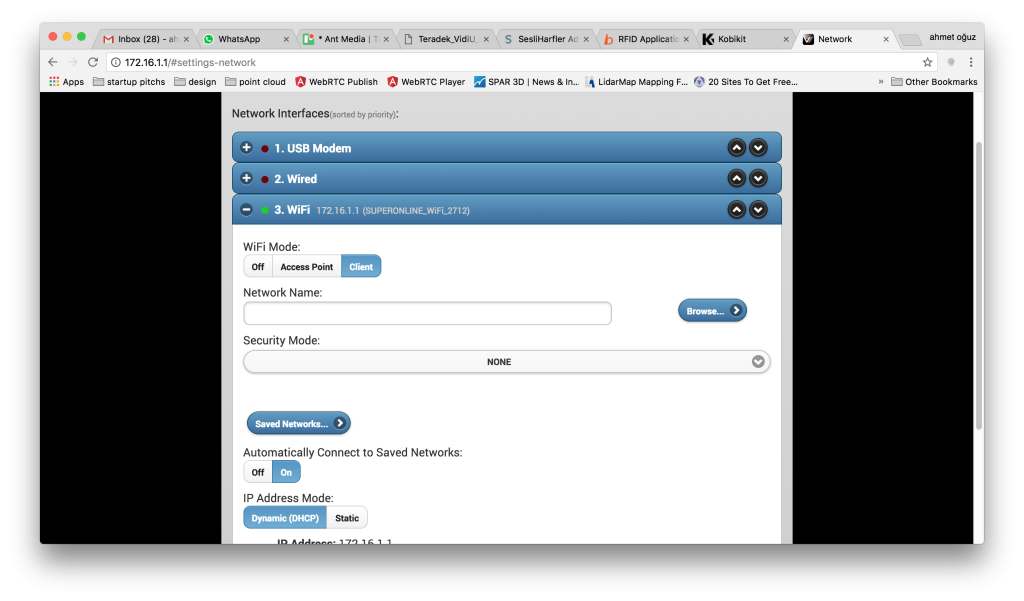
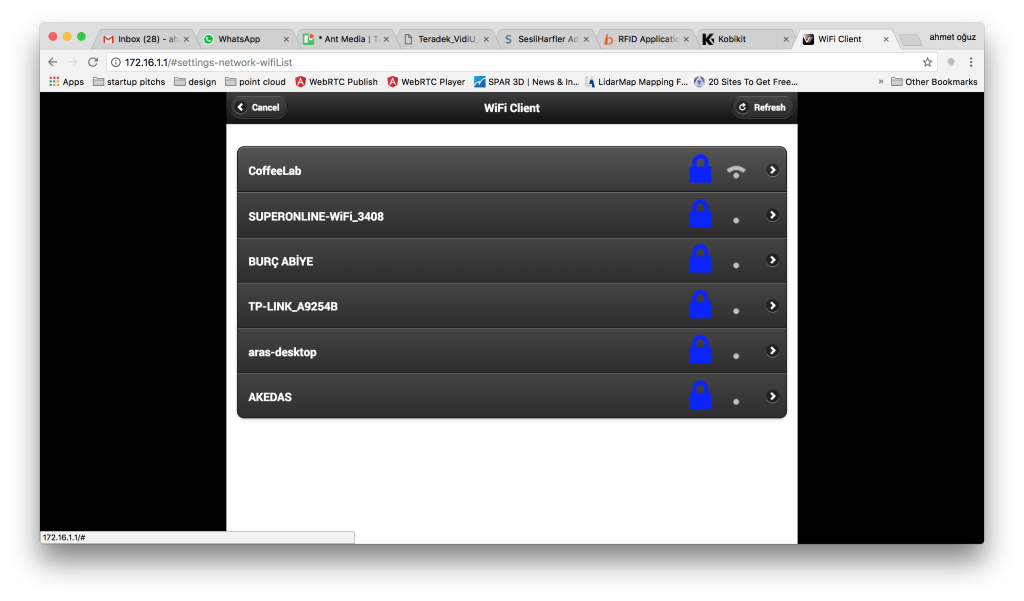
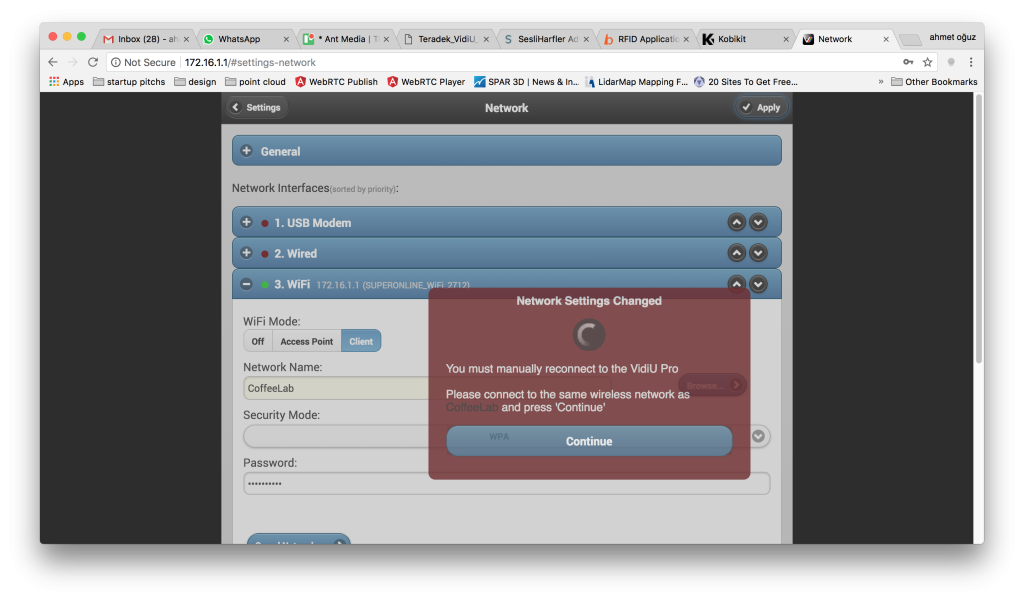
Click the WiFi item. Choose “Client” mode and Click “Browse” button to look up the WiFi networks around.
Choose the WiFi you would like Teradek Vidiu Pro to connect from the list.
Enter the password of the WiFi network and click “Apply” button on the top right
Connect to the same wireless network on your computer and check the IP address of the Teradek Vidiu Pro from device’s LED screen. Press Menu button on the device. The menu button is a joystick button as well. So go to the Network Settings > WiFi > Info to see the IP address of the device
Sometimes you may need to power off / on the Teradek Vidiu Pro.
Configure Broadcasting Settings
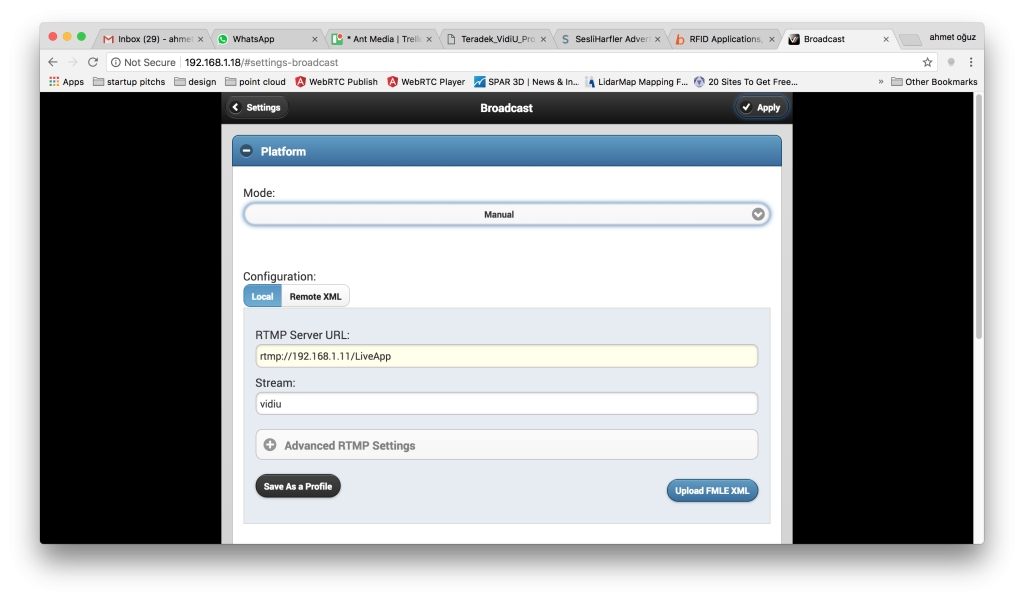
Click the “Broadcast” item on the Settings screen
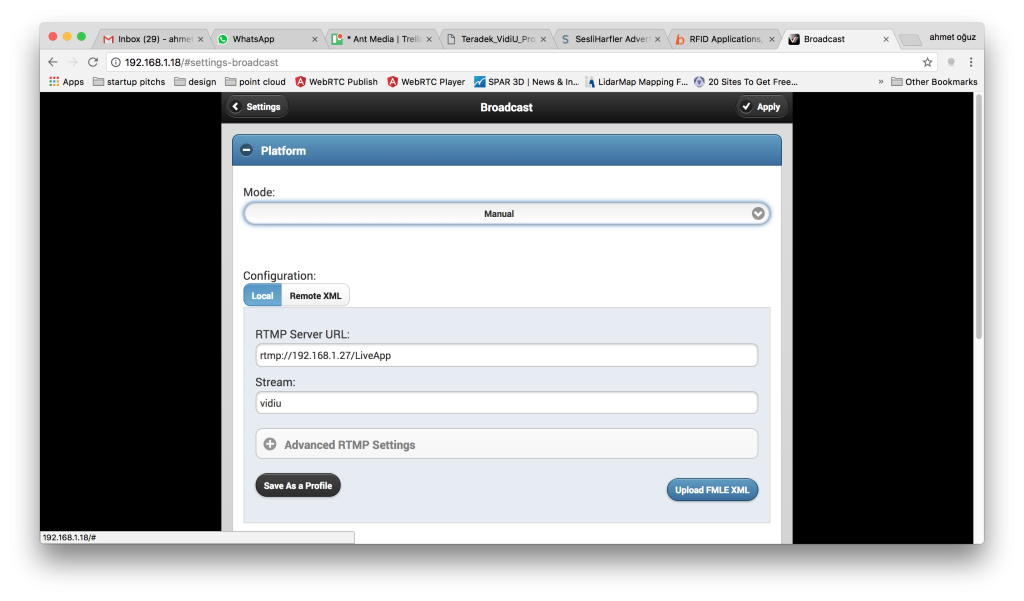
Choose “Manual” from Mode then Enter Ant Media Server address to “RTMP Server URL” and write the name of the stream to “Stream” box
Click “Apply” button on the top right again
Your device configuration is OK now.
Start Broadcasting
Connect the HDMI cable between HDMI source (camera, television or computer) and Teradek Vidiu Pro HDMI.
Wait until to see the “Ready” text appears on the right top of Teradek Vidiu Pro’s LED screen. Then press “Start/Stop” button on the device, a message appears on the device asking confirmation about starting the broadcast. Press “Yes” and then broadcasting starts.
Ant Media Server accepts that broadcast and can perform adaptive streaming, recording, and publishing to any other 3rd party RTMP server as usual.
When you are done with broadcasting, you can press “Start/Stop” button again to stop the broadcasting
And here is the end, if you have some feedback about this document or any other question, please let us know that via writing a comment on this post, using the contact form or contact@antmedia.io
